


Designing for Durability Best Practices in ODM Rotational Molding
You want your products to last, right? Achieving product longevity in ODM Rotational Molding isn't just a wish; it's a smart business move. Robust design for durability is imperative because itsignificantly reduces costs over a product's lifespan. Think about it: durable designs mean less maintenance and fewer replacements, saving you money in the long run.
Key Takeaways
- Choose the right materials and additives. This makes your product strong and resistant to damage.
- Design your product's shape carefully. Use uniform walls and rounded corners to avoid weak spots.
- Control the manufacturing process and mold design. This ensures your product is made well and lasts a long time.
Strategic Material Selection for Durable ODM Rotational Molding
Choosing the right material is the first big step toward making a durable product. You want your product to stand up to daily use and tough conditions. This means you need to pick polymers with specific properties that give your product strength and a long life.
Understanding Polymer Properties for Enhanced Strength
When you design for durability, you look at several key material properties. You need to consider mechanical properties like strength, impact resistance, and flexibility. These help your product handle physical stress. Chemical resistance is also vital. Your product must resist any chemicals it might touch. Temperature resistance ensures it performs well in expected heat or cold. For outdoor products, UV resistance stops fading and breakdown from sunlight.
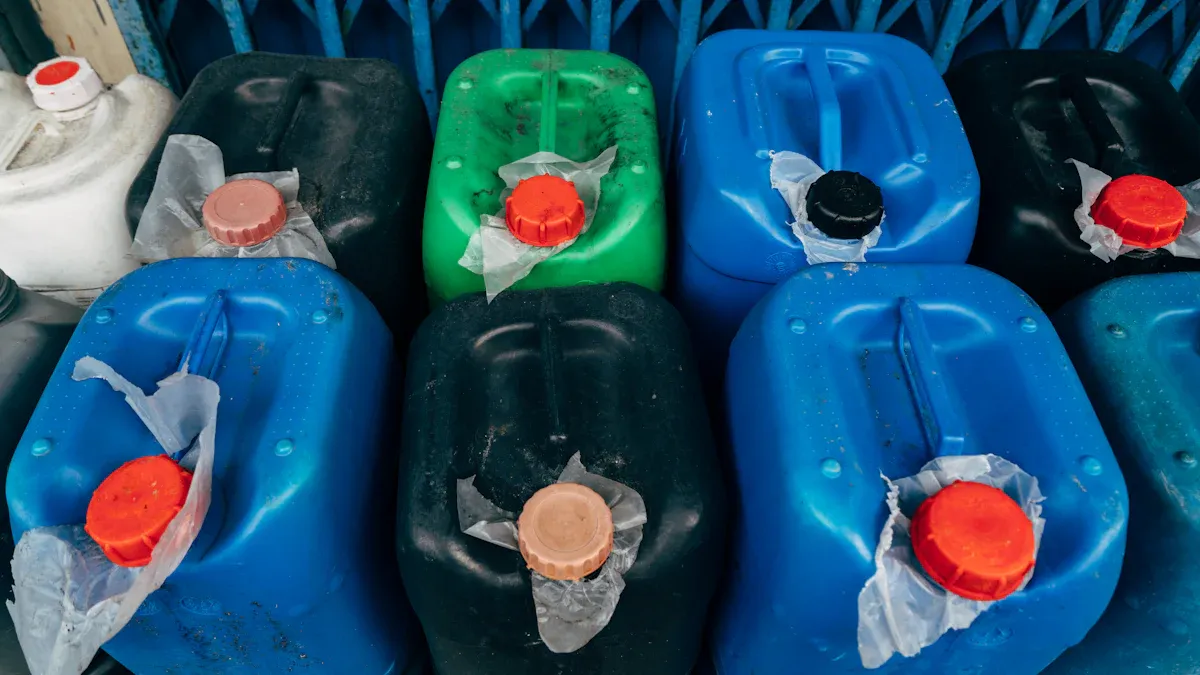
Let's look at some specific polymer types. Linear Low-Density Polyethylene (LLDPE) is tough and has excellent impact resistance. It works for many applications, like making tanks. High-Density Polyethylene (HDPE) is stiffer and harder than LLDPE. It gives you more rigidity. Cross-Linked Polyethylene (XLPE) is a special type of polyethylene. It forms chemical bonds between its polymer chains. This makes it much more robust. XLPE has significantly enhanced impact resistance and better resistance to environmental stress cracks. It also performs well in cold temperatures. This crosslinking boosts its durability, heat resistance, and chemical resistance. It gives you a product with a longer lifespan, especially for large tanks or items in harsh environments.
Impact of Additives on Product Lifespan
Sometimes, a base polymer needs a little help to reach peak durability. That is where additives come in. You can blend additives or fillers into the base resin to improve the mechanical properties of your Rotomolded Parts. For instance,studies show that adding chemically treated flax fibers or jute fibers can significantly increase the tensile strength of LLDPE composites. This means your product becomes stronger and resists pulling forces better.
Additives also play a big role in improving environmental stress crack resistance (ESCR). This is important because some chemicals or environments can cause plastics to crack over time, even without direct impact. For styrenic-based polymers, adding rubber can effectively boost ESCR. For High-Density Polyethylene (HDPE), a special additive called PE-CAN (a polyethylene-based covalent adaptable network) can greatly improve ESCR. This additive works by creating stronger connections between the HDPE and the additive. It strengthens the entanglements between the polymer chains. These entanglements are like tiny knots that hold the material together. When you strengthen them, you make it much harder for cracks to form and spread. This means your product lasts much longer in challenging conditions.
Material Testing and Validation for Performance
Choosing the right polymer and additives is crucial, but you cannot stop there. You must test and validate your material choices. This step ensures your product will perform as expected in the real world. You need to put your chosen materials through various tests. These include mechanical tests to check strength and impact resistance. You also need chemical resistance tests to see how the material reacts to different substances. For outdoor products, UV aging tests simulate years of sun exposure. Thermal cycling tests check how the material handles changes in temperature.
These tests help you confirm that the material properties meet your durability goals. They validate that your chosen polymer and additive combination will withstand the intended use environment. By thoroughly testing your materials, you catch potential weaknesses early. This prevents costly failures down the line and ensures you deliver a truly durable product to your customers.
Optimizing Part Geometry for Enhanced Strength in ODM Rotational Molding
You've picked great materials, but that's only half the battle. How you shape your product makes a huge difference in how long it lasts. Smart geometry can turn a good material into an incredibly durable product. Let's dive into how you can design your parts for maximum strength.
Uniform Wall Thickness and Consistency
Think of your product's walls like the foundation of a house. If some parts are thin and others are thick, the whole structure becomes weak. That's why uniform wall thickness is super important. When your part has consistent wall thickness, the material distributes evenly. This gives you consistent strength all over. You also want to avoid sudden changes in wall thickness. Instead, use smooth, rounded corners and fillets. This helps spread out any stress, so it doesn't all pile up in one spot. This way, you prevent weak points.
Rotational molding is actually great for achieving uniform walls compared to other plastic methods. You can even tweak the wall thickness after the mold is built and tested, which is a big plus! Unlike blow molding, where outside corners often get thin, rotational molding usually makes outside corners thicker and stronger, especially on big parts. This process ensures consistent wall thickness throughout your entire product. This uniformity is key for keeping your product strong and performing well. It also lets you control how the material spreads, making your final product better overall.
So, how do you get this consistent wall thickness?
- Draft Angles: These are crucial. They help your part pop out of the mold smoothly without damage, especially where the plastic shrinks.
- Careful Loading: When you put the powdered plastic resin into the mold, make sure it's spread out evenly. This is the first step to getting consistent walls.
- Heating and Rotating: The mold spins in an oven. This spinning makes sure the Plastic Coats the inside of the mold evenly. It sticks to the walls and keeps the thickness consistent. Even material distribution is vital for strong, high-quality parts.
- Controlled Cooling: After heating, the mold cools down. You can use air or water. This controlled cooling lets the part harden and shrink a little, making it easier to remove. Good cooling also helps keep your product strong and prevents issues like warping or uneven wall thickness.
- Monitoring: Using temperature sensors and monitoring systems helps you track things in real-time. This lets you adjust the process to get the best wall thickness and overall quality.
Incorporating Ribs and Reinforcing Features
Sometimes, a flat surface needs extra muscle. That's where ribs and other reinforcing features come in. You can add hollow ribs to boost support without making the part too heavy. For parallel walls, aim for a space that's about five times the wall thickness. This ensures good structural integrity and even heating and cooling.
When you design ribs, follow these guidelines for the best results:
- Rib Depth: Make your ribs at least four times as deep as your part's normal wall thickness.
- Rib Width: The width of your ribs should be at least five times the normal wall thickness.
- Width vs. Depth: For the strongest ribs, make sure the width is more than the depth.
- Quantity: It's often easier to make several shallow ribs than one really deep one.
- Shape: Rectangular ribs give you more stiffness than rounded ones, even with the same amount of plastic. This is because of how their depth is positioned.
- Side Walls: Give the side walls of your ribs a slight taper or draft. This helps the part release from the mold easily.
Minimizing Stress Concentration and Sharp Corners
Imagine bending a paperclip. It usually breaks at the sharpest bend, right? Plastics work similarly. Sharp internal corners or sudden changes in shape create stress concentration points. These are weak spots where cracks can start.
To make your product tough, you need to:
- Avoid Sharp Angles: Don't use sharp 90-degree angles on any inside or outside corners.
- Use Radiused Corners: Instead of sharp edges, use generous rounded corners everywhere. This greatly reduces stress and makes your product much stronger and more resistant to impacts.
- Smooth Transitions: If you must change wall thickness, make the change smooth and gradual. Think of a gentle slope, not a sudden drop-off. The transition area should be at least three times the difference in thickness. This prevents stress from building up where the thickness changes.
Managing Inserts and Fasteners for Durability
You often need to attach things to your rotomolded part. How you do this affects its overall strength. Different fastening methods have different pros and cons:
- Molded-in Inserts (Plastic or Metal): These offer high holding power. If you fuse plastic inserts properly, they create low stress in the polymer. Metal inserts work best with large flanges (like triangles or squares) to prevent them from pulling out or spinning. However, designing and processing these can be complex.
- Self-Tapping Screws: These are quick to assemble. Thread-cutting screws can cause stress or cracking, especially in brittle plastics. Thread-forming screws create large internal stresses and work better with softer plastics like polyethylenes. Both types can damage threads if you take them apart and put them back together often.
- Through-holes with External Fasteners: You drill a hole and use a bolt and nut. This method gives you high holding power and creates low stress in the plastic. It's easy to assemble, but you need access to the inside of the part.
- Other Methods: You can also glue inserts in place (reliability can be questionable), use ultrasonic or spin welding (high holding power, little stress, but needs special equipment), or expansion inserts (high holding power, simple, but can be expensive).
Choosing the right fastening method depends on your product's needs and how much stress it will face.
Designing for Loose Tolerances and Warpage
Warpage and distortion can make your product look bad and perform poorly. It happens when different parts of your product cool at different rates, causing uneven shrinkage. You can design to fight this:
- Reshape Surfaces: Use smart features like beads, bosses, flanges, and curves. You can also optimize where the mold splits and how you lay out ribs. This helps fix flatness issues, bowing, and twisting.
- Uniform Cooling: Make sure your part cools evenly. Avoid design traps like closed pockets or thick flanges that hold heat. Uneven mold construction can also cause problems.
- Manage Wall Thickness: Thick areas stay hot longer and cool slower. This creates internal stress and can cause distortion. Try to avoid too much material building up around complex features.
- Balance Features: If you put all the holes, windows, ribs, or flanges on one side, it can cool unevenly and bend. Try to balance the features and mass distribution.
- Parting Lines: The lines where the mold separates can restrict shrinkage. This might cause edges to bend or wave. Design with this in mind.
- Material Compatibility: If you mix plastics with metal inserts, foams, or different plastic layers, be careful. Different materials expand and contract at different rates with temperature changes. This can cause stress and warpage where they meet.
- Venting: Good venting is crucial. Poor venting can cause localized cooling problems or vacuum effects, leading to dishing or panels collapsing inward. Make sure your vents are big enough, numerous enough, and in the right spots.
By thinking about these geometric details, you can create rotomolded parts that are not just functional, but incredibly tough and long-lasting.
Process and Mold Design for Robust ODM Rotational Molding Products
You've chosen great materials and designed smart shapes. Now, let's talk about how the mold itself and the manufacturing process make your product strong. A well-designed mold and a controlled process are just as important for durability.
Mold Design Impact on Part Integrity
Your mold design directly affects how tough your product becomes. For example, consistent wall thickness is super important. It stops warping and stress points. You should also use generous radii at all corners, at least 5mm, or ideally three times the wall thickness. This helps spread out stress and stops cracks. Proper draft angles, usually 1-2 degrees, make it easier to remove the part from the mold. This prevents damage that could weaken it.
Parting lines, where mold sections meet, are also critical. You want to minimize them and avoid placing them on sharp corners. Always add a radius there. This reduces flashing and warpage. Mold sections must stay precisely together during heating and cooling. Even tiny shifts can cause blowholes, which hurt the part's strength. Using ribs and kiss-offs also makes your product stronger without adding much weight. If you use molded-in inserts, make sure they are compatible with the material and anchored well. This prevents pull-out or weak spots.
Venting and Cooling Strategies for Strength
Good venting is crucial in ODM Rotational Molding. It stops high pressure from building up inside the mold. This pressure can distort your parts. If you don't vent properly, you might see incomplete filling, burn marks, or weak bonding.
Cooling also plays a big role in strength. Slower cooling processes make your plastic stronger. For example, slower cooling increases crystallinity in materials like Polyamide 11. This boosts tensile strength and flexural strength. It also makes the material less likely to break when stretched.
| Cooling Method | Cooling Time (s) | Approximate Cooling Rate (°C/min) |
|---|---|---|
| Free cooling | 1500 | 0.5 |
| Air cooling | 800 | 1.0 |
| Water cooling | 500 | 1.5 |
Controlling Processing Parameters for Optimal Properties
You need precise control over several things during manufacturing. Oven temperature is key. If it's too hot, you get burns or deformities. If it's too cold, the material won't fuse well, leading to weak spots. Rotation speed also matters. Too fast, and you get incomplete fusion. Too slow, and the material spreads unevenly. Proper cooling time is vital too. Fast cooling can cause internal stresses. Slow cooling makes the process take longer. Controlling these parameters ensures your product has the best possible strength and quality.
You've learned how crucial it is to combine smart material choices, clever part geometry, and precise manufacturing. This integrated approach ensures superior durability for your products. Focusing on these areas builds a reputation for excellence. It helps you deliver top-quality solutions, keeping customers satisfied.
To achieve this, remember to optimize:
- Part Design: Minimize stress and ensure even material spread.
- Mold Design: Use precise dimensions and good cooling.
- Processing Conditions: Control temperature, rotation, and cooling time.
This commitment to durability offers long-term value for your ODM Rotational Molding products. It makes your brand stand out.
FAQ
Why is uniform wall thickness so important for durability?
Uniform walls prevent weak spots. They help your product handle stress evenly. This makes it much tougher and last longer.
What kind of additives make my product stronger?
Additives like flax fibers boost strength. Others, like PE-CAN, stop cracks. They make your plastic resist damage better. 💪
How does mold design affect my product's strength?
A good mold design ensures even material distribution. It also prevents stress points. This makes your final product much more robust.